Uncategorized

Easy Peasy Deconstructed Roman Shades

Comments Off on Easy Peasy Deconstructed Roman Shades Written on November 11th, 2016 by
Categories: Uncategorized
Tags: , , , , ,

It started as an upcycle…

blog-pic-1

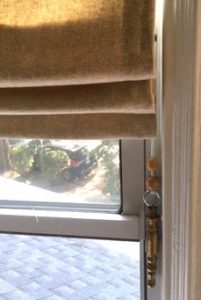
My previous tenant left some beige wool felt curtains that she had made. The fabric came from the upscale menswear company where she worked; I was delighted at the uncommonly nice goods I had inherited! I pictured them as unlined roman shades: a super simple, minimal window treatment. I also knew that I wanted them to be removable for dry cleaning.

shade-rod

Traditionally, roman shades are installed and left in place until they are unbelievably filthy, or the fabric starts falling apart, or a combination thereof.  Making them removable for cleaning keeps them fresh and attractive longer, and when it’s time to replace the shades you can re-use the dustboard or hardware.

Roman shades are usually attached to a dust board: a piece of wood which holds the cord lock and the eye-hooks that guide the strings. The shade fabric is stapled to the top of the dust board , which is then screwed into the window frame, allowing the fabric to cascade down the front.

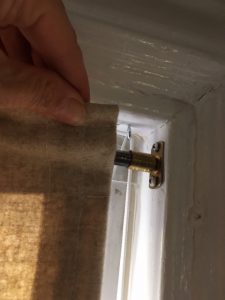
I eliminated the dustboard altogether and hung the shades like a curtain on a rod, with the eyehook/string guides attached right to the window frame.


Making the shades:

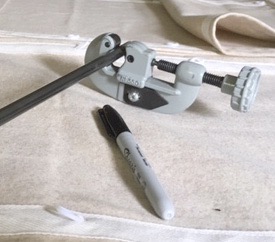
Roman shades work on a string lift system.  The rings are evenly space on the back of the shades in vertical and horizontal rows, and a bar at the bottom keeps the shade in place and helps guide the fabric to fold into pleats as the fabric lifts. I re-purposed some lamp pipe as my weight bar at the bottom and some lamp finials for the shade pulls.

blog-pic-pipeblog-pic-finial


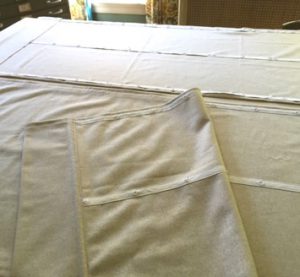
I thought I would save some time by using “ring tape” and sewing that to the back of the fabric instead of sewing on the rings by hand. The “ring tape” creates a stripe which becomes a part of the design of the shade.  Sewing the tape on straight, I have learned, is as much a challenge as sewing on the rings; best to do this only if you like the look of the tape.

blog-pic-ring-tape

The shades are trim and translucent, giving a warm glow when they are down in daytime and privacy at night.  The fabric is now on its third life from its initial purchase for clothing, so it’s been diverted from the waste stream a few times already and should last a long while as clean-able shades.

Big Funky Floor Lamp Requested

Comments Off on Big Funky Floor Lamp Requested Written on October 4th, 2016 by
Categories: Uncategorized
Tags: , , ,


img_4731

img_4737-copy

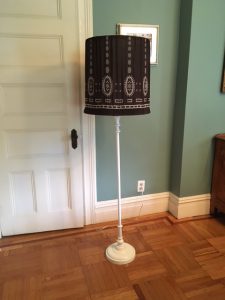
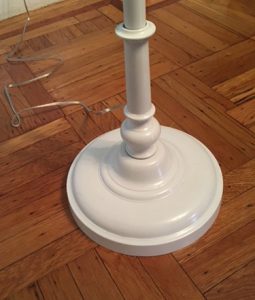
Once I got the Emergency Lamp Call, I put together a collection of floor lamp parts from various pieces in the basement, on a sturdy base.  The finishes were incompatible but easily brought into line with a can of white gloss paint and many light coats over the course of the day, which gave it a rich, glossy and even finish.

img_4741

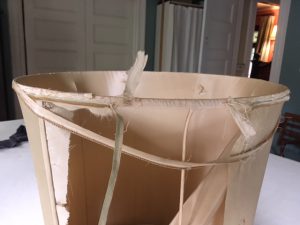
I stripped down a huge vintage silk shade and recovered the frame. The call was for Big. Here is where it pays to be discerning in your junk; with older lamp shades, the silk shades are the most tattered, as silk tends to split over time while the synthetics are often intact. But the frames for silk shades are meticulously wrapped with a thin ribbon, to allow the shade fabric to be stitched on – and if you are recovering the shade, you can take advantage of this feature.

Sidebar… I tried wrapping a shade frame once with the special ribbon for it, and don’t advise trying this at home!

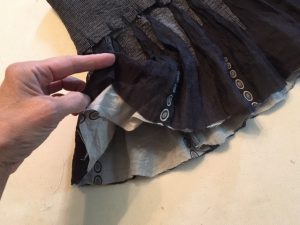
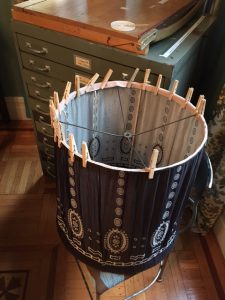
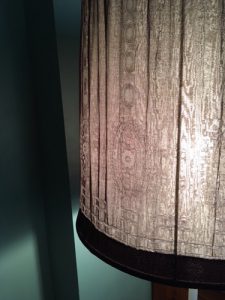
In a time-savings coincidence, the fabric I used was a funky skirt I bought at a street fair, having found that the times I would ever wear this skirt were exactly Never. I left the gathering elastic at the top, and stitched in a hem at bottom to anchor to the shade frame. Then, I pinned the fabric up tight to the top band, allowing the elastic to set the gathers; otherwise there would be way too much material to sort out. I stitched the skirt to the ribbon-wrapping of the frame. Lastly, I cut off the top of the skirt and finished the shade with glued-on banding to hide the cut edge and stitching.

Best part is the surprise effect when it lights up; by day it’s a graphic contrast, by night the dark and light sheer layers created a soft moiré pattern and beautiful diffused light…

  img_4694  img_4723  img_4705-copy


Summer Projects Roundup

Comments Off on Summer Projects Roundup Written on September 1st, 2016 by
Categories: Uncategorized
Tags:

IMG_4480

My summer projects list was pretty ambitious. For starters, I finally got the porch repainted! Notice how the chair color matches the house? That’s no accident.  I used the house primer on them!  For this application use Alkyd primer, and sand the chairs first, especially if there is rust!

I also wanted to organize and clean up my workshops in the basement, but more importantly to reverse the flow of projects; instead of more and more stuff piling up that I mean to fix, having things leave the basement to either start a new life of usefulness- or resigned to the curb for another soul to try.

IMG_4479


And these chairs with the beautiful antique silver finish? (A street find that I stripped down, repaired and refinished) Check! Headed to upholsterer with fabric…


Also, various lamps in my  shop.  This gooseneck lamp has been on the table for months- I kept the industrial chic look with a simple finish treatment- steel wool to remove the rust, and a coating of linseed oil to prevent it from recurring. The oil gives the metal a great sheen. I always re-wire vintage lamps, as older cords can crack and become dangerous, and the plugs often not polarized

IMG_4448   IMG_4456     IMG_4458

Have a lamp you want to resuscitate?  See a previously posted blog on how to re-wire lamps.

I hope your summer was as fruitful!


Talking To My Socks

Comments Off on Talking To My Socks Written on August 6th, 2016 by
Categories: Decorating Ideas, Olive Blog, Uncategorized
Tags: , , ,

IMG_3768

The bestselling Marie Kondo book, The Life-Changing Magic of Tidying Up, has a lot of fans and detractors.  I decided to read it after several people,whose opinions and values I shared,  had recommended it,  Many of her practical suggestions include organizing like-things together, storing things for optimal access and viewing, and letting go of extraneous things; all which resonated with me.  Sometimes her suggestions were outside my normal scope of organizing activity; e.g., in one section, she instructs you to roll your socks in pairs and to thank them for their service in taking care of your feet.  As one article I read about the book noted, if millions of Americans have read it, and even a fairly small percentage follow her edicts, then we have  thousands of people in America talking to their socks.

My take-away on the book was the way she makes you think about organizing, which trumps any misgivings I have about speaking with my garments or household items.  While I first thought some of her methods were a little extreme, or too sentimental (or inaccessible, as far as time commitments goes), I eventually found that I began looking at spaces and re-organizing them without over-thinking it after reading her book. It feels more organic now.  Thus far, the changes have been ‘sticking’ so I feel like the book is as much about the mindset as it is about the practical advice. I manage organizing with minor incursions through cabinets, drawers and closets instead of the wholesale practice she recommends.  It works for me, as waiting until I had time to do a major sweep through all the cabinets or all the closets would be like waiting for Godot.

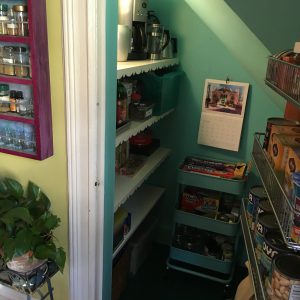
The before and after of my pantry;  I am no longer embarrassed if the door is left open-

IMG_3730


…Before…


                   IMG_3771 (1) …After

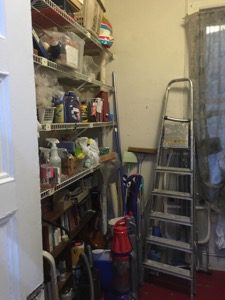
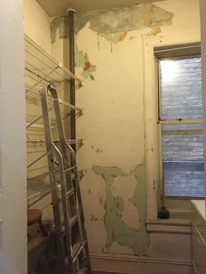
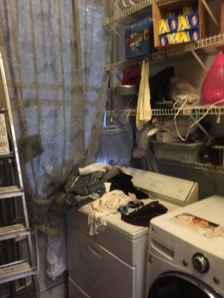
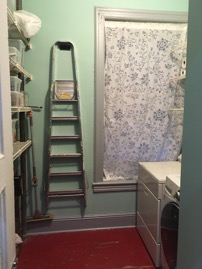
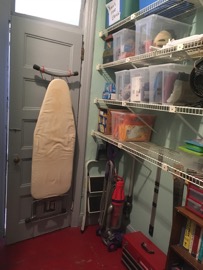
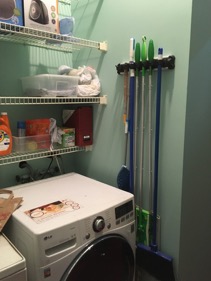
Then, I moved onto bigger game.  A client’s heavily used laundry room in a co-housing space for 5 adults had fallen into disrepair and was choked with clutter.  I was able to offload many bags of trash, and organize other items into the laundry room so shared items are easily found; this opened up space in other parts of the apartment for much needed storage.

Before..

Laundry  Laundry before 2Laundry before 4


After…

Laundry after 1   Laundry after 2   Laundry after 4   Laundry after 3

Best of luck in your organizing endeavors! Tell your socks I said hello.

Turning a new (Nano)Leaf

Comments Off on Turning a new (Nano)Leaf Written on June 30th, 2016 by
Categories: Uncategorized

Always on the lookout for interesting lighting…


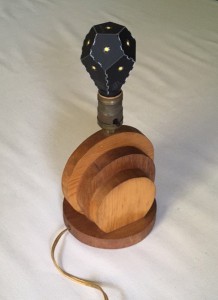
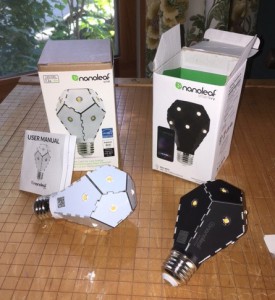
I found this LED bulb at the 2016 ICFF (international contemporary furniture fair).  The bulb is made of flat plates with LED sensors, which        gives it a deconstructed look… sort of like a Tim Burton version of a light bulb.  It has interesting features- both the white and black versions are  dimmable by flipping switch on and off at just the right point. but for added fun, the black model is programmable with a cell phone!  I      personally will never ever use this feature, but it was the perfect gift for a techie friend who will.  I just couldn’t resist pairing the super modern    deconstructed bulb with a lamp I found on Ebay,  which is its total opposite.  The lamp is clearly a Wood Shop project from the 50’s .  The    wood-   circles that make the lamp are a little quirky, but not bad for a hand guided jig saw; it has years of patina on the switch.


What I only just discovered is what a great sense of humor the makers of Nanoleaf  bulbs have.  I was reading the “instruction manual”  and it  just got better and better.

From the user’s guide:

#11.The Nanoleaf One bulb is meant to be out in the open and admired, so it will lash out if  placed into a fully enclosed fixture.

#12.Once the Nanoleaf bulb is damaged, it will be polluted with evil thoughts.  Stop using immediately if the bulb becomes damaged or open, or  experience its terrible wrath and mood swings.

Good to know.


Antique Hardware

Comments Off on Antique Hardware Written on June 9th, 2016 by
Categories: Uncategorized

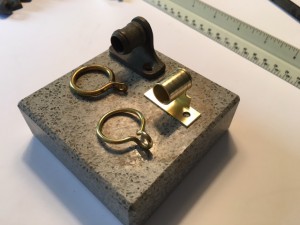
It seems like you never get tired of finding new ways to prove “they don’t make them like they used to,” as things get ever more cheaply made.  One more for the hopper: drapery hardware, specifically barrel sockets for hanging sheers.  I was upstate foraging in a drawer in an antique store, and found these beautiful brackets, and at $2 a pair, worth it to buy them just to admire the heft and quality. I like the matching rings as well! I photographed them with the today’s equivalent.


Kitchen Cabinets Redo, Okay, The Fridge Comes Too

Comments Off on Kitchen Cabinets Redo, Okay, The Fridge Comes Too Written on October 26th, 2015 by
Categories: Uncategorized


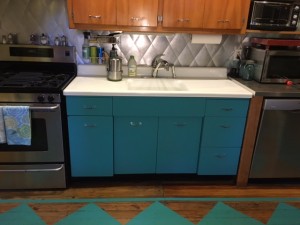
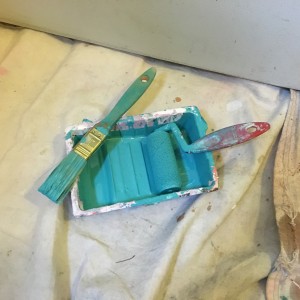
Painting cabinets is a great way to spend $15 on a can of paint and have a totally renewed surface, bringing in a color punch, freshening up the space. There will eventually be chips, which can be touched up or eventually recoated- but I figure its worth the minimal outlay in materials and an afternoon of your time for the good looking outcome. I recoat the cabinets when they become chipped, but also to refresh the finish so it stays cleaner and is glossy, the surface dulls with wear and cleaning products.


I have a vintage metal kitchen cabinet underneath the sink, it came with the house and was already (badly) recoated white when I bought the house 20 years ago-so I started off with paint over paint.

It was oil paint, and I used oil paint going forward. I prefer oil for furniture and cabinetry but it does create a stink. I always liked the smell of paint, associating it with Progress and Fresh Starts until I learned that the smell was actually neurotoxins. There are Green latex products with little or no smell, but I deal with the stink in exchange for a much tougher surface; I recommend doing this project when you can have the windows wide open. If you use latex, get a primer that can transition the surface from oil to latex.

There was a pronounced 20” drip ridging the front, and cabinet was dinged and chipped. I prepped it by scraping the drip off with a razor lightly sanding the whole surface, and cleaning with a Tri-Sodium Phosphate based cleaner to remove any grease or residue.

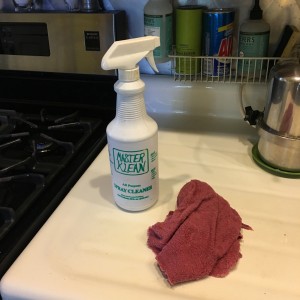
My uncle developed this super strong stuff called Master Klean, and I bring up a case of it every few years when visiting family, but any strong cleaner with TSP will do it- or you can buy the powder version TSP and mix a solution yourself. Use gloves.

Where drawers meet, or anywhere there is scraping or chips, give some extra sanding to reduce the chip “crater “and it will make most single coat chips disappear.

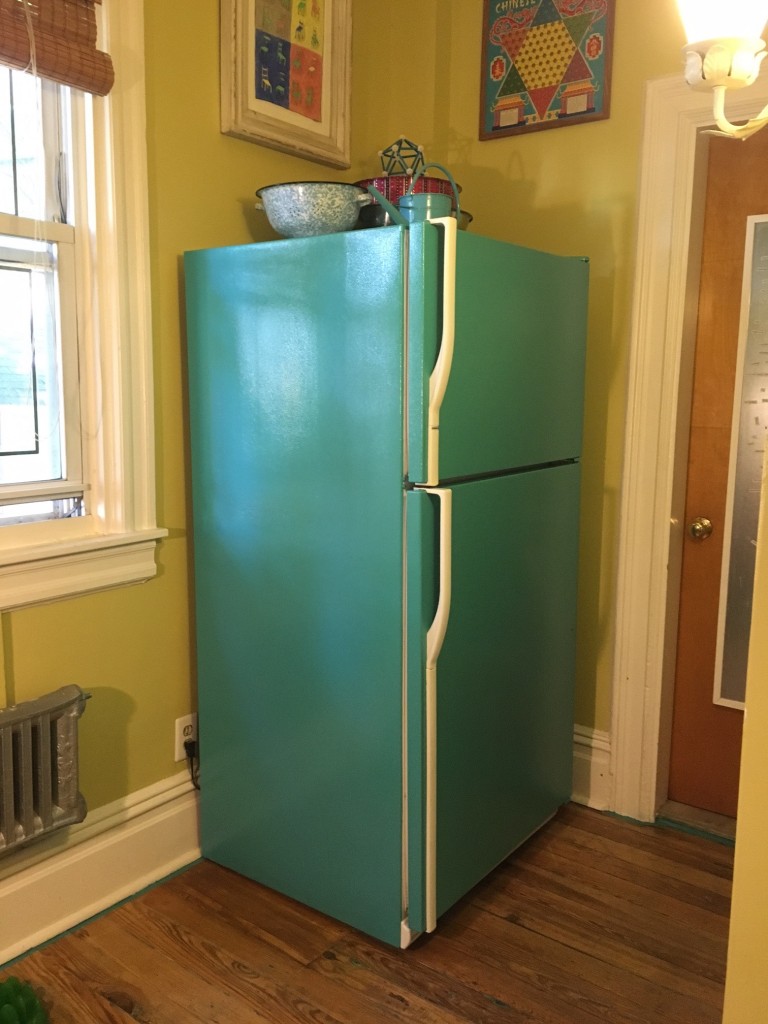
As I was doing the cabinets, I noticed how terribly shabby my 15 year old white behemoth refrigerator looked.

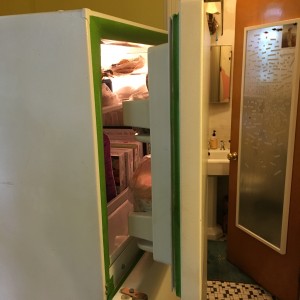
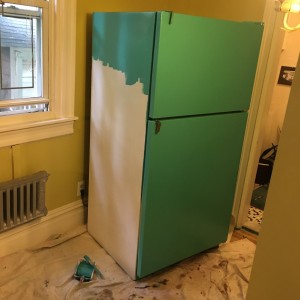
I decided it was okay to call that a metal cabinet as well- and pulled out the fridge so I could do a test run on the hidden side.  I prepped it the same way, a light sanding to give the surface some tooth, (gives the new paint better grip) and scrubbed it with strong cleaner to get rid of any dirt or residue that would interfere with paint adhesion. The test side looked amazing so I proceeded. Special considerations when doing a fridge: mask out ¼” or so from the seal.

You don’t want to paint the surface the seal hits, it will have too much wear and tear, and potentially chip. And you don’t want to have to cut in all the way around the seal, which is a fairly irregular line (on my fridge, anyway).

Do take off the handles first. It was a bear getting them off but being able to paint the whole front of the fridge with a roller gives me a fantastic finish, and if I had to go around the handle with a brush it would look messy.So I left a quarter inch “wrap” onto the face of the fridge sides, leaving me well clear of the seal, repeating this on the the door.

What took even longer than wrestling handles off was moving all the magnetic poetry off the side of the fridge. I want to leave the teal surface unadorned, so I put a magnetic bulletin board

on a nearby door to deflect anything from landing on the fridge door. The grubby white handles got a good cleaning with the tri-sodium phosphate cleaner and they brightened right up.
I had always liked the gaily colored fridges from Big Chill, and this is my no-frills version. With the crisp white handles and cool teal color, it has a little mid century snap.

Totally worth my leftover cabinet paint and a few hours of my time.

DO try this at home.


Bits & Bobs of Paint

Comments Off on Bits & Bobs of Paint Written on October 13th, 2013 by
Categories: Uncategorized

Being a colorist, I am no stranger to having extra bits of paint hanging around.  I have about 300 cans in the basement at any point. Most civilians though can find lurking on their basement shelves some colors they tried out  a few years ago for the dining room, or some paint from when the den used to be green.  To recycle the cans, they must first be emptied. You can wait for the yearly city wide hazardous materials round up or find a creative use for it. Recently, when my mom’s house needed repainting, I mixed up about 5 gallons of various colored paints and was happy to be able to thin down the paint can collection by about 50 cans- a necessary reduction every few years so the basement isn’t overrun.  The house looks amazing, the basement is under control and cans were recycled properly.

But usually it’s just a handful of paints you wonder what to do about, as luckily most people don’t count their paint stores in the hundreds.  A few great ideas on using up the bits and bobs of paint:

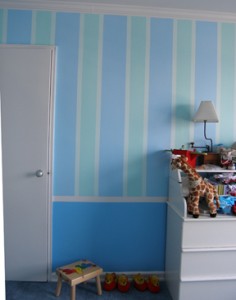
Adding stripes!

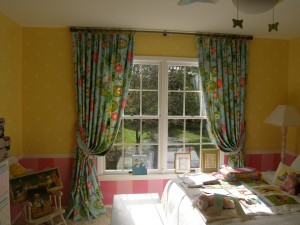
Always a fun feature, takes some painting precision and attention to detail, but worth the effort. Especially for making a kids room more fun.  You can also paint the lower part of the wall a different color, easier for touch ups when most of the damage happens in the first 30″ or so…

… or freshen up a closet.

I love opening a closet and seeing an unexpected shot of color.  I once helped a client paint her closet/dressing room “Fuschine” a total saturated rose-wine color.  It took many coats as color was so intense, but it was really beautiful. She is a stylist so it was important to her to have her closet laid out beautifully.  We put in a chandelier as well…

On a humbler note,  my most recent closet update was my daughter’s room, where, at her request, I mixed up a deep purple.  I took before and after photos, figuring the change from 30 year old dingy white paint would be dramatic.

How often when we are painting do we skip the closet? But  as a weekend project, it doesn’t take much paint, and in this instance-other than the contortions required to paint a closet that is only 13″ wide and 5 feet long– not a whole lot of effort.  The door and floor I painted in gloss oil paint, as I prefer the more durable finish on floors and I had the paint anyway.  Who couldn’t resist the cheery yellow paint against the purple?

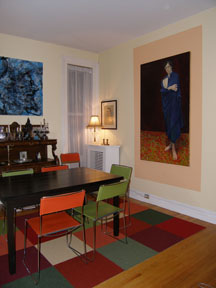
In other spaces I have used small amounts of paint to add focus and a “frame” of sorts to an unframed painting- In the photos below the color areas behind the frame mimic the color blocks of the FLOR covering.


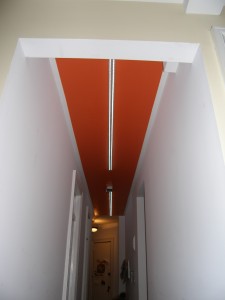
Paint can be a problem solver as well.  One of my clients installed some LED lights in a hallway to showcase some artwork he intended to hang there, but the lights were too cold.  I warmed things up a bit by painting the ceiling a strong tangerine color.

Mary mix paint example

It not only made the light less cold, but the sterile looking fixture seemed more part of a plan than a haphazard installation.  By “floating” a panel on the ceiling, I avoided uneven lines where the strong color meets the top of the wall (never even in an old building) and this is also less time consuming to paint.  Making it an island rectangle gave me a stopping point for where the hallway ended, instead of carrying the color into the connecting foyer.  When I later added a softer off-white to the hallway walls, (another “mary-mix”), using about 8 cans of paint leftovers in various warm off-whites to create a lovely and soothing color) I repeated the technique of not painting into the wall/ceiling join, masking it out an inch and a half below the join and the unpainted white corner bead between wall and ceiling became an “implied” cove molding in white.  My leftover sample paints helped me fix my client’s lighting problem.  Best container for mixing, storing and carrying your leftover paint concoctions?  Recycled 1 gallon joint container buckets!


My Pink Bathroom Update

In the spirit of preserving the past with a contemporary twist, here is the completed update on the Pink Bathroom project. As a quick recap, this idea started with a visit to the Save My Pink Bathroom blog. As it turns out, there is an entire community of enthusiasts fighting to “save” their mid-century pink bathrooms. As Pam describes her mission:

“This little website grew out of mid-century home lovers’ concern that pink bathrooms were being ripped out of post-war American homes way too hastily. How sad it is, to catch a TV makeover show that rips out a perfectly beautiful vintage bathroom… Seems like a bunch of the rest of the world — well behind our curve — actually dislikes mid-century pink bathrooms.  They will regret what they have done.”

Often here in Flatbush with our turn of the century homes it was a mid-century decision to “modernize” the bathroom in the newly popular pink color. The tradition of the pink bathroom emerged from the former first lady Mamie Eisenhower, in office 1953 –1961.

Looking at them now, they are totally dated, but with the wrong date stamp for our late victorian houses. Fiscal prudence often dictates embracing the pink bathroom and working with what you have, and I have grown quite fond of mine.  It must be the fourth pink bathroom I have had since I started householding. For a low-cost, low-environmental impact project, here are my tips on saving your pink bathroom – or redecorating any bathroom for that matter.

I was missing a few pink bullnose tiles that had fallen out and broken years ago, and pulling the medicine cabinet out of the wallOlive Design Bathroom damaged a few more.  As per my previous blog on this, I sent one of the samples to Chippy Scaparelli at World of Tile. She sent back 4 tiles that were a perfect match.  Thanks to Pam for featuring that tip on her site.  My contractor, John Duval, replaced the missing tiles and you can’t tell now which ones they were, it is seamless.  I opted to have the contractor regrout the entire bathroom.  What a huge improvement, it looked brand new, sharp crisp and clean. Worth every penny, and my contractor was amazing in keeping the mess contained- he wiped down the stairs as he was leaving so it wasn’t tracked all over- I was very impressed.
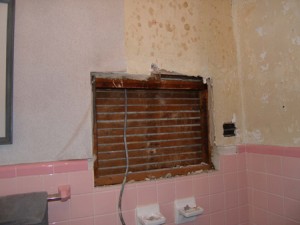
 

I discovered that “clear” in powder coating is 1. More expensive and 2. Not clear at all but a weird taupey/gray.  It looked awful.  The folks at Evernu Metal were kind enough to offer to recoat it in white. It wasn’t what I was going for originally, but it looks fresh and pretty against the bright white new grouting.  The inside I painted turquoise, just for fun.
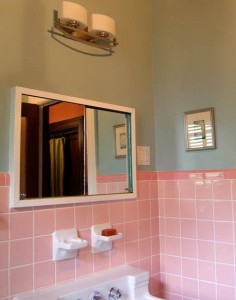
I knew what color I had in mind for the walls, and in the spirit of both thrift and environmentalism, I went down to my shop in the basement and mixed up just the color I needed using various leftover paint samples.  Mixing left over paint is a great alternative if you don’t want to discard it or wait for the yearly collection of hazardous waste materials that the city sponsors. If you don’t have any leftover paint from previous projects, go to Build-It-Green NYC, arguably the best source of paint for a low-cost project. They have gallons upon gallons of paint in their Astoria warehouse.. many for $5 a can. They get their supplies donated from surplus construction and renovation projects, so if you can’t re-use your own paint, re-use theirs! (P.S. they also have another location in Gowanus, Brooklyn). Another place with the same ethos is Habitat for Humanity’s ReStore for those of you located in Westchester, Long Island, and beyond.

The shower curtain and window fabric that I used was made from yardage I had hand screened printed while an apprentice at the Fabric Workshop in Philadelphia after college. The colors worked well with both tile and wall color, and I liked the funky pattern in here- and bonus point, I already had the fabric, and was glad to see it used.

My pink chandelier was up-cycled from a table lamp part that I converted into a hanging fixture, and painted to match the bathroom.  The ceiling in the bathroom is dropped and made of some sort of acoustical tile that had seen better days.  I had routinely painted it gloss white in the past to freshen it, but I took the opposite tack here and made another “mary mix” paint from the samples stash, and came up with a nice charcoal gray.  It looks dramatic, and helps hide the flaws in the ceiling.  The dark color seems to make the ceiling float up and away

As with most projects, this one took about twice as much time as initially anticipated. Overall, I am pleased with the outcome and loving my pink bathroom!


Would love to hear your comments on my Facebook page on how you’ve updated your own bathroom with a budget and environmentally conscious approach.

 

Refurbishing An Old Lamp

Comments Off on Refurbishing An Old Lamp Written on June 19th, 2012 by
Categories: Uncategorized
Tags: , , , , , ,

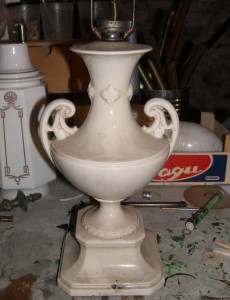
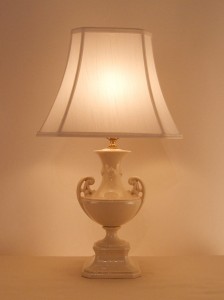
Brooklyn Interior DesignI have been making lamps from recycled and vintage parts for a number of years and love the creative buzz that comes from taking interesting parts and making something unexpected, beautiful and functional. But sometimes you stumble on a vintage lamp that just needs a little loving care and restoration, some updated wiring, a pretty shade.  I found this lovely piece heading toward a dumpster as one of the houses near me was being emptied for sale, its owner having moved to smaller digs.  I loved the classic shape and underneath the dirt and rusted parts, I knew there was an amazing lamp waiting to happen.

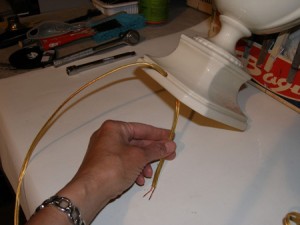
First I ditch the cord; chances are on a lamp this old the wire is shot.  My rule of thumb is that if when I bend the wire it feels like it is going to crack then it gets replaced- or if it predates polarized plugs and both of the prongs are same-size.  I buy wire and plug sets from a parts supplier, but if you are doing it yourself you can get wire and snap on plugs from a hardware store.  If you don’t know how to wire a lamp, there are lots of places to get it done.  I recommend Ricky from Lamp Warehouse. (Lamp Warehouse recently downsized when it changed owners, but they were savvy enough to keep Ricky on as the repair department.) While I do my own wiring generally, I bring him more complicated things like chandeliers and multiple socket fixtures and he does a fantastic job.Brooklyn Design

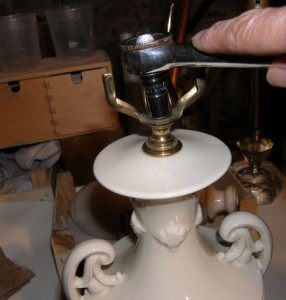
Looking at this lamp, I love everything about it and don’t feel much need to embellish, but I do see one area that needs improvement.  The socket for this lamp is set right on top of the ceramic base.  In order to site a shade properly you might miss some of the prettiness of the full lamp piece- or alternatively have some of the socket exposed.  Usually you want a shade to come down to the bottom of the socket. Also, the harp saddle (which holds the wire “harp” that supports the shade) is the old fashioned type- it can’t be changed for size unless you take apart the lamp.  I replace it with a universal saddle so, I can change harp size without having to take off the socket.  I take the lamp apart, unscrewing it from the top socket (on some lamps its easier to get from the bottom- wherever it gives most easily) and disassemble. My dad taught me this trick- if there are a lot of small parts- and with many lamps there are, line up the pieces carefully in the order you took them off the center rod.  Then, after cleaning or refinishing each piece, put them back on in the same order. I hate getting a lamp all put back together and then finding another piece on my workbench.  When re-assembling my vintage lamp I find a rod from my workshop that is about an inch longer;  when I am putting the lamp back together, I will add a 1” brass  “neck” to the top. This gives me a little clearance from the bottom of the shade to the top of the lamp, you will see more of the lamp and it doesn’t “squish” the lamp shape if I want to cover the whole socket with the shade.
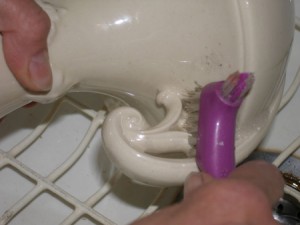
Brooklyn DesignWhile the lamp is apart I scrub it thoroughly and let it dry.  The old ceramic can take a lot of cleaning and is very durable.  Sometimes under all the dirt you find a flaw, this time I think it was probably a gap in the original glaze, but I don’t want it to catch dirt so after the lamp base is dry I carefully put a little clear nail polish in the ding and it fills it nicely and evens the sheen so you don’t even see it.Brooklyn Design

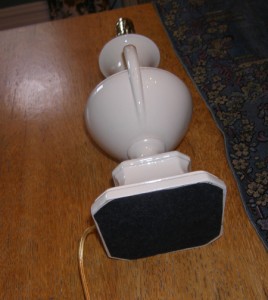
When you are ready to run the new wire, make sure you start through the “wireway” hole in the base, so the lamp will sit flat on the table.  When all is assembled, felt the bottom so that it doesn’t scratch your table. I tighten with a socket wrench, tight enough so it feels stable, but with glass or ceramic you have to make sure you don’t put it together so tightly you crack the pieces.  Sometimes where metal check washers meet the ceramic I use a rubber washer to cushion it so I can tighten it more without damaging the base.

Brooklyn Interior Design

Finding the perfect shade is another story that will end up as a blog one of these days….My workshop has come to critical mass with vintage parts bursting out of all my cupboards.  Keep an eye peeled on my Etsy store as I add new lamps over the summer, and plan for a Fall Lamp Salon.

Brooklyn Interior Design