Posts Tagged ‘Brooklyn Interior Design’

Upcycled Ottoman

Comments Off on Upcycled Ottoman Written on December 1st, 2014 by
Categories: Decorating Ideas
Tags: , , , , , , ,

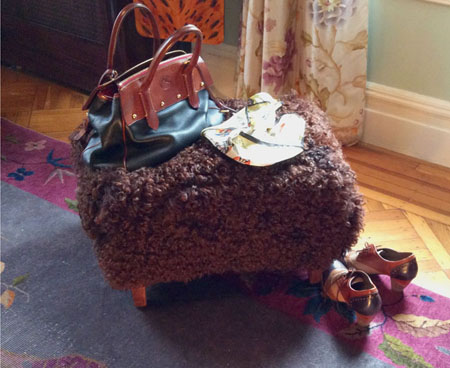
Upcycled Ottoman

After one of my clients asked me to help her make a Mongolian Fur ottoman, I soon begin to spot these fun footstools all over the market; shaggy poufs and hoof-legged ottomans are ubiquitous now in stores and catalogues. The October Cover of Elle Décor sports a pretty blue fur piece.

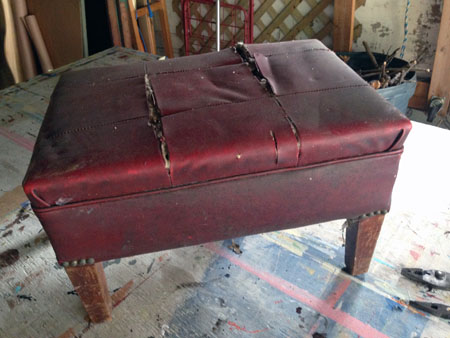
I was recently given an old fur coat that was just a little too far gone in need of repairs, and I remembered a footstool I had picked up at some yard sale or thrift shop.  My upcycled fur ottoman was in the works.

Rescued Ottoman

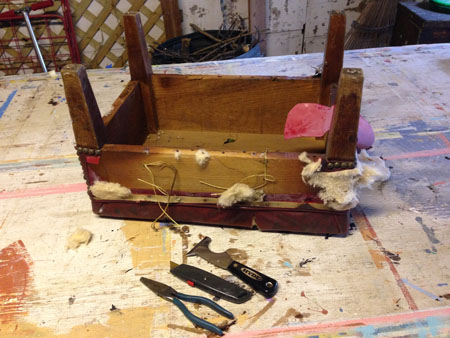
To keep costs down I stripped down the footstool myself, taking out all the nails and staples. I sanded the legs down to bare wood with an orbital sander then stained and waxed them.

Deconstructing


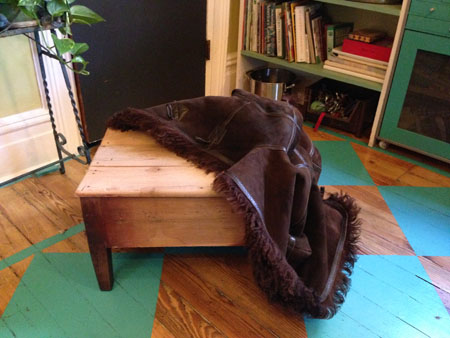
The upholsterer put a padded top on the ottoman, and made the coat into a loose fitting slip cover.

Ottoman meets Fur


Toggle Detail

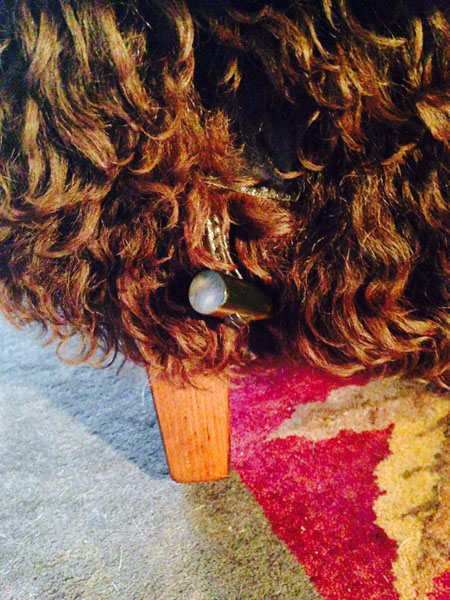
My ottoman may have more character than most: one side has a discreet and neatly edged opening for the pocket. The other sports a toggle closure in a wink to it’s former life.

First lamp show of 2014

Comments Off on First lamp show of 2014 Written on May 28th, 2014 by
Categories: Decorating Ideas, Neighborhood Notes, Olive Design
Tags: , , , , ,

Mary Olive Design: Unique Lighting

June 8th, 2014 12pm – 4pm

209 Westminster Road, Brooklyn, NY 11218

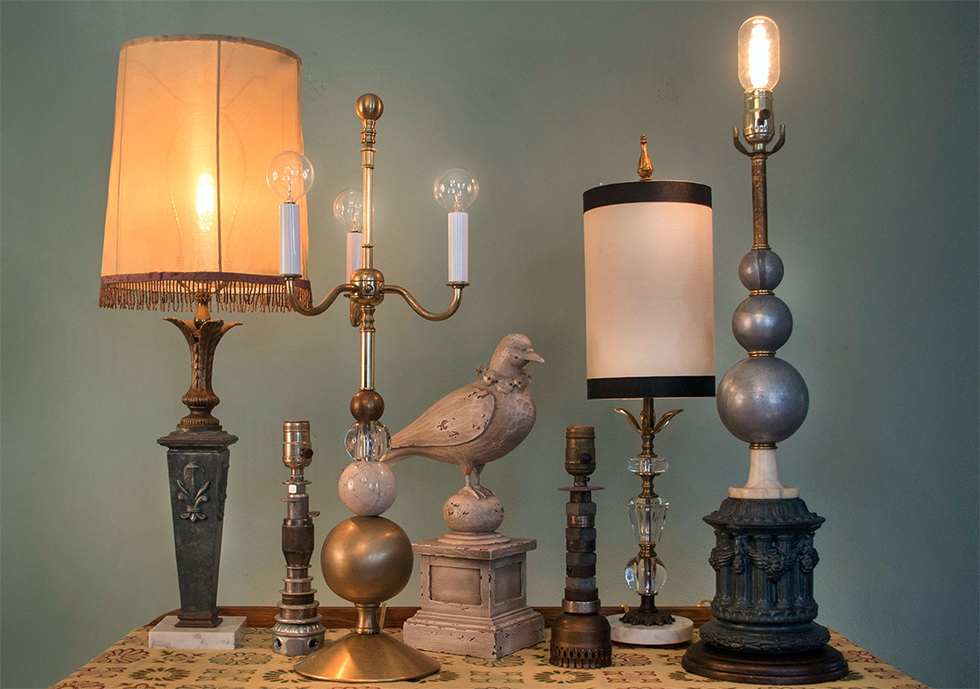
Join me at my home studio, and browse my collection of lamps, lovingly handmade from salvaged, vintage, and repurposed parts. Each one has been carefully considered and crafted for beauty and balance.

Featuring a trunk show of works on paper by Katie VanVliet, a printmaker from Philadelphia, PA. You can preview her work at www.katevanvliet.com.

Many of my lamps are available to preview on my Etsy shop, and many many more will be unveiled during the show!

Silk Purse/Sow’s Ear

Comments Off on Silk Purse/Sow’s Ear Written on March 11th, 2014 by
Categories: Decorating Ideas, Olive Blog, Olive Design, Olive Green
Tags: , , , , ,

Curbside or thrift shop treasures while a bargain, usually lead me to the question- will I ever really fix this up to use it?   It depends on the level of decreptitude- or for me, if it’s the exact size piece I need for the space, and if its basically a better piece of furniture than I can buy cheaply.  While my kids hated the groovy painted furniture I put in their rooms and pined for Ikea almost-wood, I prefer a solid piece of real wood furniture in a classic shape and solidly built.  I can see past the peeling paint and occasional dangling part to what it could be with a little elbow grease.  But filling the space requirements is usually what tips me into actually doing the work on it.

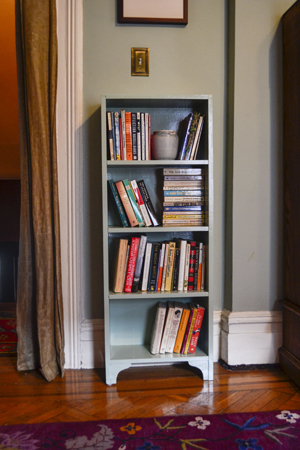
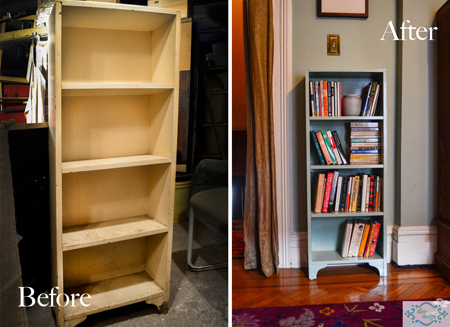
My latest rescue was the perfect sized bookshelf for my bedroom, when my excess books were stacked in front of the radiator and collecting dust on the floor. It was old, had a gazillion coats of paint, some peeling and the front leg was cracked.

Before you do anything, take off any paint that looks like it is ready to jump ship anyway, using a spackling knife rather than a scraping tool, so you don’t pull up tight paint- I didn’t want to strip it (way too much work for this piece) but if you have any notions that new paint glues down peeling old paint, disabuse yourself of that idea.  It usually means your new paint will soon come off as well.  Top coat is only as secure as the bottom layer.

After the removal of loose stuff, take a sander to it- it will smooth down the previous layers, some of the brush marks and let you know where drips are that you haven’t noticed.  Sometimes I help those off with a sharp razor.


Orbital palm sanders are cheap and easy to use, they should be  a part of any handy-person’s tool collection.

Fix the busted leg- I use an old your-name-here credit card that comes in the mail every day with new card offers, its just the right thickness to work the glue into the crack.
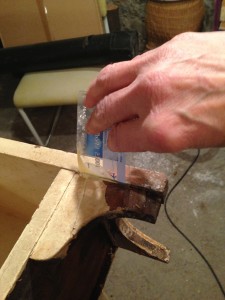

I use clamps to hold it in place while it dries, and glued a block into the corner behind the leg to give it more stability.  Cut the block down so you can’t see it from the front.  I clamp the leg so the glue can set.

Then predrill a hole, and run a flat head screw into several points to give it extra strength and stabilize it.
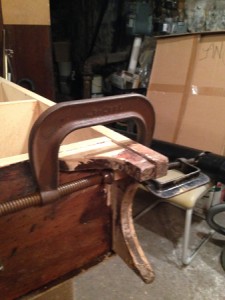
If you have the bits, its nice to counter sink the hole (a wider hole at the top to accommodate the flat screw head) so the screw isn’t noticeable, you can fill the top with compound to make it invisible. This fix it step took about 20 minutes, and now I don’t have to worry about the leg cracking off, and the fix is invisible.

For the paint job, I use the same type of paint, in this case oil-based.  I prefer alkyd paint for furniture anyway, as its tougher, but always best for paint adhesion to stick to the original paint type. For my color, I mixed some leftover oil based paints, to get something fairly close to the wall color.  I want the bookcase to blend in, not stand out.  If it was a more interesting accent piece I might have gone with a bolder color.

Once it’s done and in place, I’m glad I took the time!
 

For all the pinners out there:
Retrofit Your Vintage

Comments Off on Retrofit Your Vintage Written on July 11th, 2012 by
Categories: Decorating Ideas, Olive Green
Tags: , , , , , ,

Or should I call it funky improvements?  Or love your retro?  Or the I’ll-renovate-after-I-pay–for college makeover.

Sometimes renovation is just not the right solution, whether its time, mess, or budget considerations.  So you make the best of it and just go with it.

The point in case for me is the Pink Bathroom.  I don’t know who came through this neighborhood in the 40’s, but I do know they were pretty darn persuasive and that I am not alone with my Pink Bathroom.  I found a website called “Save the Pink Bathrooms” created by Pink Bathroom advocate Pam Kueber.via, http://savethepinkbathrooms.com/about/

From Pam’s website:

5 million pink bathrooms — I believe that pink was the single-most popular color for bathrooms in the 1950s, and estimate that some 5 million pink bathrooms went into the 20 million+ homes built in the United States from 1946-1966.

I wonder if she is including the retrofitted pink bathrooms from turn of the century charmers such as we have here, because there are pink bathrooms a’plenty.

Read on for 10 facts about pink bathrooms, I like #2:

“Mamie Pink” – First Lady Mamie Eisenhower was pivotal in popularizing the color, which is often referred to at “Mamie Pink” or “First Lady Pink.” Her husband President Dwight D. Eisenhower sent her pink flowers every morning. She re-decorated the private quarters in the White House in pink — so much so that reporters called it the “Pink Palace.” And, the bathroom in her Gettysburg retirement home was pink down to the cotton balls.

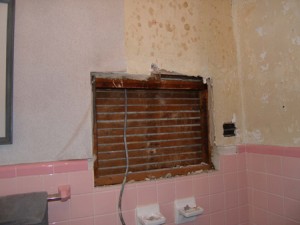
Brooklyn DesignI took a photo of the start point in my bathroom so perhaps it will hold my feet to the fire to get this done and I hope to put up “finish” photos by Christmas.  Some things I want to change: wall color, lighting, and the medicine cabinet.  The fluorescent fixture attached to the top of the med cabinet died some time ago.  I have a cool pink chandelier that I made from lamp parts, but nothing over the sink.  So, in order to get all that happening, we had to remove the medicine cabinet from the wall and detach the light- I hired an electrician to put in a box for my lights, and a GFI outlet so I have somewhere to plug in a hairdryer.

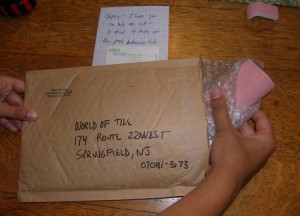
Unfortunately, when the medicine cabinet came out, a few of the tiles did also, and one of them broke.  I was already missing one of the pink bullnose trim tiles from it loosening and falling. To replace the missing tiles, I went to the site recommended by Save the Pink Bathroom, World of Tile and they told me to get my tile and send it to “Chippy” to match.  It’s going out today!  I will tell her how much I need and hope she can help me out.Brooklyn Design

I am contemplating HC-136 walls, a great historic blue-green, dark gray on the ceiling and, happily, my hand printed Fabric Workshop curtains and shower curtain will look amazing with this renovation.

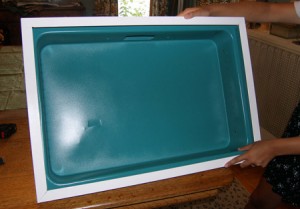
The medicine cabinet was a disaster, rim and body were both rusted.  As I could not find a similar size cabinet and didn’t want to get into massive wall renovation (and mess up the tile issue even more!) I brought my cabinet in to get powder-coated at Ever-nu metal, in Park Slope.  For around $300 they took the body of the cabinet, sandblasted off the rust and made it turquoise (lots of colors to choose from!) and the outer rim is a neat white gloss that will look fab against the pink tile.  I reckoned that it was less expensive to do this than to get a new body, pay the shipping, and pay a contractor to resize the opening.  The original size was just fine, the hole already there, the sliding mirror doors in good shape  (and safely put away until we reinstall this cabinet). It was surprisingly easy to take out the cabinet, only 4 screws held it in place.

Brooklyn Interior DesignStay tuned for notes from the battlefield.  This afternoon I will make matters worse by taking off the rest of the wallpaper.  I always tell my clients as they get antsy watching the progress of renovation mess up their house- you’ve got to break some eggs to make an omelet….


Refurbishing An Old Lamp

Comments Off on Refurbishing An Old Lamp Written on June 19th, 2012 by
Categories: Uncategorized
Tags: , , , , , ,

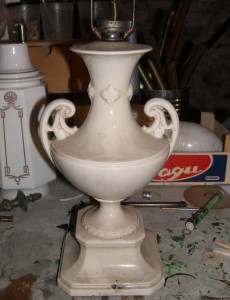
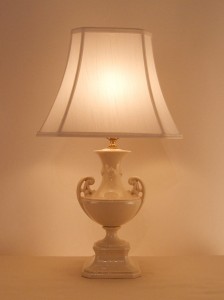
Brooklyn Interior DesignI have been making lamps from recycled and vintage parts for a number of years and love the creative buzz that comes from taking interesting parts and making something unexpected, beautiful and functional. But sometimes you stumble on a vintage lamp that just needs a little loving care and restoration, some updated wiring, a pretty shade.  I found this lovely piece heading toward a dumpster as one of the houses near me was being emptied for sale, its owner having moved to smaller digs.  I loved the classic shape and underneath the dirt and rusted parts, I knew there was an amazing lamp waiting to happen.

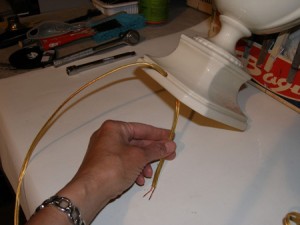
First I ditch the cord; chances are on a lamp this old the wire is shot.  My rule of thumb is that if when I bend the wire it feels like it is going to crack then it gets replaced- or if it predates polarized plugs and both of the prongs are same-size.  I buy wire and plug sets from a parts supplier, but if you are doing it yourself you can get wire and snap on plugs from a hardware store.  If you don’t know how to wire a lamp, there are lots of places to get it done.  I recommend Ricky from Lamp Warehouse. (Lamp Warehouse recently downsized when it changed owners, but they were savvy enough to keep Ricky on as the repair department.) While I do my own wiring generally, I bring him more complicated things like chandeliers and multiple socket fixtures and he does a fantastic job.Brooklyn Design

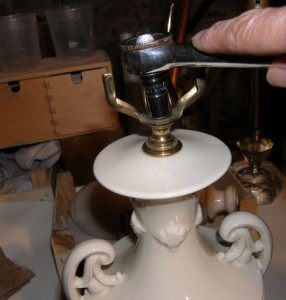
Looking at this lamp, I love everything about it and don’t feel much need to embellish, but I do see one area that needs improvement.  The socket for this lamp is set right on top of the ceramic base.  In order to site a shade properly you might miss some of the prettiness of the full lamp piece- or alternatively have some of the socket exposed.  Usually you want a shade to come down to the bottom of the socket. Also, the harp saddle (which holds the wire “harp” that supports the shade) is the old fashioned type- it can’t be changed for size unless you take apart the lamp.  I replace it with a universal saddle so, I can change harp size without having to take off the socket.  I take the lamp apart, unscrewing it from the top socket (on some lamps its easier to get from the bottom- wherever it gives most easily) and disassemble. My dad taught me this trick- if there are a lot of small parts- and with many lamps there are, line up the pieces carefully in the order you took them off the center rod.  Then, after cleaning or refinishing each piece, put them back on in the same order. I hate getting a lamp all put back together and then finding another piece on my workbench.  When re-assembling my vintage lamp I find a rod from my workshop that is about an inch longer;  when I am putting the lamp back together, I will add a 1” brass  “neck” to the top. This gives me a little clearance from the bottom of the shade to the top of the lamp, you will see more of the lamp and it doesn’t “squish” the lamp shape if I want to cover the whole socket with the shade.

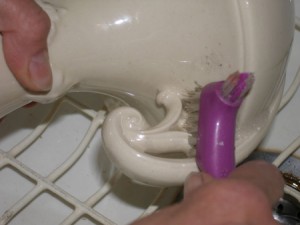
Brooklyn DesignWhile the lamp is apart I scrub it thoroughly and let it dry.  The old ceramic can take a lot of cleaning and is very durable.  Sometimes under all the dirt you find a flaw, this time I think it was probably a gap in the original glaze, but I don’t want it to catch dirt so after the lamp base is dry I carefully put a little clear nail polish in the ding and it fills it nicely and evens the sheen so you don’t even see it.Brooklyn Design

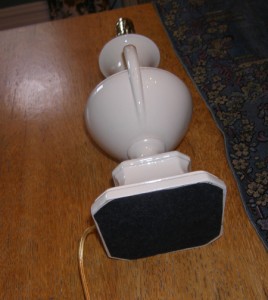
When you are ready to run the new wire, make sure you start through the “wireway” hole in the base, so the lamp will sit flat on the table.  When all is assembled, felt the bottom so that it doesn’t scratch your table. I tighten with a socket wrench, tight enough so it feels stable, but with glass or ceramic you have to make sure you don’t put it together so tightly you crack the pieces.  Sometimes where metal check washers meet the ceramic I use a rubber washer to cushion it so I can tighten it more without damaging the base.

Brooklyn Interior Design

Finding the perfect shade is another story that will end up as a blog one of these days….My workshop has come to critical mass with vintage parts bursting out of all my cupboards.  Keep an eye peeled on my Etsy store as I add new lamps over the summer, and plan for a Fall Lamp Salon.

Brooklyn Interior Design