Posts Tagged ‘Recycle’

Easy Peasy Deconstructed Roman Shades

Comments Off on Easy Peasy Deconstructed Roman Shades Written on November 11th, 2016 by
Categories: Uncategorized
Tags: , , , , ,

It started as an upcycle…

blog-pic-1

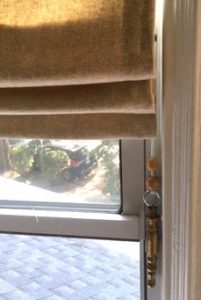
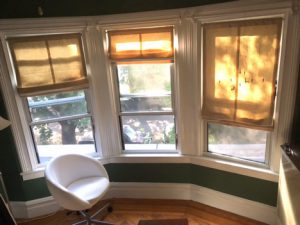
My previous tenant left some beige wool felt curtains that she had made. The fabric came from the upscale menswear company where she worked; I was delighted at the uncommonly nice goods I had inherited! I pictured them as unlined roman shades: a super simple, minimal window treatment. I also knew that I wanted them to be removable for dry cleaning.

shade-rod

Traditionally, roman shades are installed and left in place until they are unbelievably filthy, or the fabric starts falling apart, or a combination thereof.  Making them removable for cleaning keeps them fresh and attractive longer, and when it’s time to replace the shades you can re-use the dustboard or hardware.

Roman shades are usually attached to a dust board: a piece of wood which holds the cord lock and the eye-hooks that guide the strings. The shade fabric is stapled to the top of the dust board , which is then screwed into the window frame, allowing the fabric to cascade down the front.

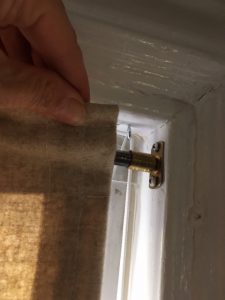
I eliminated the dustboard altogether and hung the shades like a curtain on a rod, with the eyehook/string guides attached right to the window frame.


Making the shades:

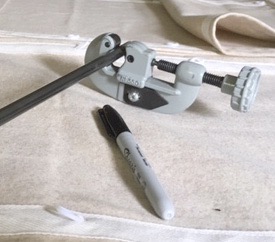
Roman shades work on a string lift system.  The rings are evenly space on the back of the shades in vertical and horizontal rows, and a bar at the bottom keeps the shade in place and helps guide the fabric to fold into pleats as the fabric lifts. I re-purposed some lamp pipe as my weight bar at the bottom and some lamp finials for the shade pulls.

blog-pic-pipeblog-pic-finial


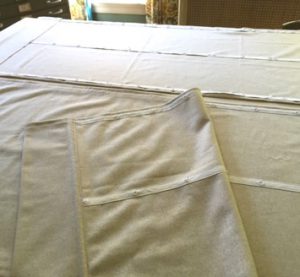
I thought I would save some time by using “ring tape” and sewing that to the back of the fabric instead of sewing on the rings by hand. The “ring tape” creates a stripe which becomes a part of the design of the shade.  Sewing the tape on straight, I have learned, is as much a challenge as sewing on the rings; best to do this only if you like the look of the tape.

blog-pic-ring-tape

The shades are trim and translucent, giving a warm glow when they are down in daytime and privacy at night.  The fabric is now on its third life from its initial purchase for clothing, so it’s been diverted from the waste stream a few times already and should last a long while as clean-able shades.

My Pink Bathroom Update

In the spirit of preserving the past with a contemporary twist, here is the completed update on the Pink Bathroom project. As a quick recap, this idea started with a visit to the Save My Pink Bathroom blog. As it turns out, there is an entire community of enthusiasts fighting to “save” their mid-century pink bathrooms. As Pam describes her mission:

“This little website grew out of mid-century home lovers’ concern that pink bathrooms were being ripped out of post-war American homes way too hastily. How sad it is, to catch a TV makeover show that rips out a perfectly beautiful vintage bathroom… Seems like a bunch of the rest of the world — well behind our curve — actually dislikes mid-century pink bathrooms.  They will regret what they have done.”

Often here in Flatbush with our turn of the century homes it was a mid-century decision to “modernize” the bathroom in the newly popular pink color. The tradition of the pink bathroom emerged from the former first lady Mamie Eisenhower, in office 1953 –1961.

Looking at them now, they are totally dated, but with the wrong date stamp for our late victorian houses. Fiscal prudence often dictates embracing the pink bathroom and working with what you have, and I have grown quite fond of mine.  It must be the fourth pink bathroom I have had since I started householding. For a low-cost, low-environmental impact project, here are my tips on saving your pink bathroom – or redecorating any bathroom for that matter.

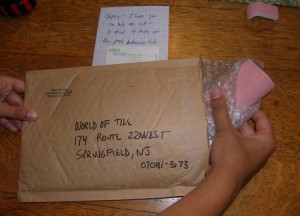
I was missing a few pink bullnose tiles that had fallen out and broken years ago, and pulling the medicine cabinet out of the wallOlive Design Bathroom damaged a few more.  As per my previous blog on this, I sent one of the samples to Chippy Scaparelli at World of Tile. She sent back 4 tiles that were a perfect match.  Thanks to Pam for featuring that tip on her site.  My contractor, John Duval, replaced the missing tiles and you can’t tell now which ones they were, it is seamless.  I opted to have the contractor regrout the entire bathroom.  What a huge improvement, it looked brand new, sharp crisp and clean. Worth every penny, and my contractor was amazing in keeping the mess contained- he wiped down the stairs as he was leaving so it wasn’t tracked all over- I was very impressed.
 

I discovered that “clear” in powder coating is 1. More expensive and 2. Not clear at all but a weird taupey/gray.  It looked awful.  The folks at Evernu Metal were kind enough to offer to recoat it in white. It wasn’t what I was going for originally, but it looks fresh and pretty against the bright white new grouting.  The inside I painted turquoise, just for fun.
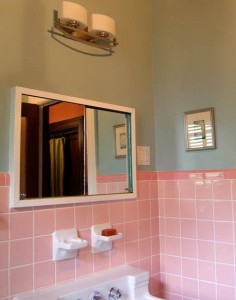
I knew what color I had in mind for the walls, and in the spirit of both thrift and environmentalism, I went down to my shop in the basement and mixed up just the color I needed using various leftover paint samples.  Mixing left over paint is a great alternative if you don’t want to discard it or wait for the yearly collection of hazardous waste materials that the city sponsors. If you don’t have any leftover paint from previous projects, go to Build-It-Green NYC, arguably the best source of paint for a low-cost project. They have gallons upon gallons of paint in their Astoria warehouse.. many for $5 a can. They get their supplies donated from surplus construction and renovation projects, so if you can’t re-use your own paint, re-use theirs! (P.S. they also have another location in Gowanus, Brooklyn). Another place with the same ethos is Habitat for Humanity’s ReStore for those of you located in Westchester, Long Island, and beyond.

The shower curtain and window fabric that I used was made from yardage I had hand screened printed while an apprentice at the Fabric Workshop in Philadelphia after college. The colors worked well with both tile and wall color, and I liked the funky pattern in here- and bonus point, I already had the fabric, and was glad to see it used.

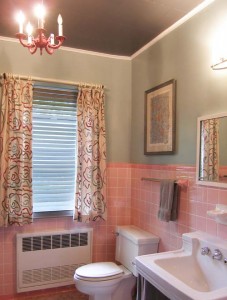
My pink chandelier was up-cycled from a table lamp part that I converted into a hanging fixture, and painted to match the bathroom.  The ceiling in the bathroom is dropped and made of some sort of acoustical tile that had seen better days.  I had routinely painted it gloss white in the past to freshen it, but I took the opposite tack here and made another “mary mix” paint from the samples stash, and came up with a nice charcoal gray.  It looks dramatic, and helps hide the flaws in the ceiling.  The dark color seems to make the ceiling float up and away

As with most projects, this one took about twice as much time as initially anticipated. Overall, I am pleased with the outcome and loving my pink bathroom!


Would love to hear your comments on my Facebook page on how you’ve updated your own bathroom with a budget and environmentally conscious approach.
 

Retrofit Your Vintage

Comments Off on Retrofit Your Vintage Written on July 11th, 2012 by
Categories: Decorating Ideas, Olive Green
Tags: , , , , , ,

Or should I call it funky improvements?  Or love your retro?  Or the I’ll-renovate-after-I-pay–for college makeover.

Sometimes renovation is just not the right solution, whether its time, mess, or budget considerations.  So you make the best of it and just go with it.

The point in case for me is the Pink Bathroom.  I don’t know who came through this neighborhood in the 40’s, but I do know they were pretty darn persuasive and that I am not alone with my Pink Bathroom.  I found a website called “Save the Pink Bathrooms” created by Pink Bathroom advocate Pam Kueber.via, http://savethepinkbathrooms.com/about/

From Pam’s website:

5 million pink bathrooms — I believe that pink was the single-most popular color for bathrooms in the 1950s, and estimate that some 5 million pink bathrooms went into the 20 million+ homes built in the United States from 1946-1966.

I wonder if she is including the retrofitted pink bathrooms from turn of the century charmers such as we have here, because there are pink bathrooms a’plenty.

Read on for 10 facts about pink bathrooms, I like #2:

“Mamie Pink” – First Lady Mamie Eisenhower was pivotal in popularizing the color, which is often referred to at “Mamie Pink” or “First Lady Pink.” Her husband President Dwight D. Eisenhower sent her pink flowers every morning. She re-decorated the private quarters in the White House in pink — so much so that reporters called it the “Pink Palace.” And, the bathroom in her Gettysburg retirement home was pink down to the cotton balls.

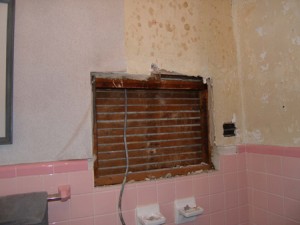
Brooklyn DesignI took a photo of the start point in my bathroom so perhaps it will hold my feet to the fire to get this done and I hope to put up “finish” photos by Christmas.  Some things I want to change: wall color, lighting, and the medicine cabinet.  The fluorescent fixture attached to the top of the med cabinet died some time ago.  I have a cool pink chandelier that I made from lamp parts, but nothing over the sink.  So, in order to get all that happening, we had to remove the medicine cabinet from the wall and detach the light- I hired an electrician to put in a box for my lights, and a GFI outlet so I have somewhere to plug in a hairdryer.

Unfortunately, when the medicine cabinet came out, a few of the tiles did also, and one of them broke.  I was already missing one of the pink bullnose trim tiles from it loosening and falling. To replace the missing tiles, I went to the site recommended by Save the Pink Bathroom, World of Tile and they told me to get my tile and send it to “Chippy” to match.  It’s going out today!  I will tell her how much I need and hope she can help me out.Brooklyn Design

I am contemplating HC-136 walls, a great historic blue-green, dark gray on the ceiling and, happily, my hand printed Fabric Workshop curtains and shower curtain will look amazing with this renovation.

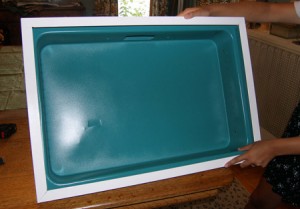
The medicine cabinet was a disaster, rim and body were both rusted.  As I could not find a similar size cabinet and didn’t want to get into massive wall renovation (and mess up the tile issue even more!) I brought my cabinet in to get powder-coated at Ever-nu metal, in Park Slope.  For around $300 they took the body of the cabinet, sandblasted off the rust and made it turquoise (lots of colors to choose from!) and the outer rim is a neat white gloss that will look fab against the pink tile.  I reckoned that it was less expensive to do this than to get a new body, pay the shipping, and pay a contractor to resize the opening.  The original size was just fine, the hole already there, the sliding mirror doors in good shape  (and safely put away until we reinstall this cabinet). It was surprisingly easy to take out the cabinet, only 4 screws held it in place.

Brooklyn Interior DesignStay tuned for notes from the battlefield.  This afternoon I will make matters worse by taking off the rest of the wallpaper.  I always tell my clients as they get antsy watching the progress of renovation mess up their house- you’ve got to break some eggs to make an omelet….


Humble Parts

Comments Off on Humble Parts Written on July 3rd, 2012 by
Categories: Decorating Ideas, Olive Green
Tags: , , , , , , , ,


Brooklyn Design
This weekend I was helping a friend put up curtain hardware, and we were looking for a fast and inexpensive solution for a double window.  The apartment is a rental and my friend had no interest in fancy hardware.  And neither was there time to order custom rods.  I have a knee-jerk reaction to putting up “extendable” rods, the one-size-fits-many variety.  Not only do I not like the way these rods look, I dislike that each time you open or close the curtains, the rings, (or rod pocket), catches on the join;  every single day as you yank the curtains over the join you have the irritation of a badly designed product. I use wood rods a lot because they are cut to fit.  Metal rods I often have custom fabricated, so that I can get one with out that extension joint in the middle.

As we didn’t have time to go to my drapery hardware supplier, I did a dive into Home Depot to see what they offered for speedy installation.  A serviceable wood rod was available in an ok color.  Then the finials, and the rings…it was starting to get pricey, and I was thinking the wood was just fine, but not spectacular. Alas, they ended up not even having the right brackets (in a disappointing marketing plan they don’t even carry the right brackets).

Brooklyn Design

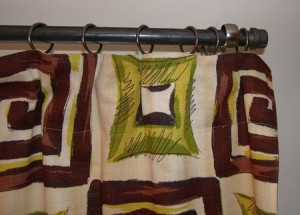
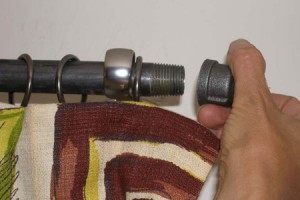
I have in the past used plumbing pipe for hardware, so I took a stroll over to that department.  I found a great looking steel pipe with threaded ends, in just the right size. It had nice little caps to use as finials.  And it came in a “gun metal” black –gray finish, similar to one I had specified on some pricey custom metal rods.  For about $12.00 I had a fantastic rod and finials!  I went back to the Décor dept at Home Depot, and found a “Universal Bracket” for around $14.00/pair that could be used to hang the rod.  I made sure brackets seemed sturdy – the rod was a hefty weight and I was glad I wasn’t hanging super-heavy curtains on them.  There were nice metal rings available that fit the rod as well. The brackets and rings were both a matte silver that worked well with the gunmetal finish of the rod.

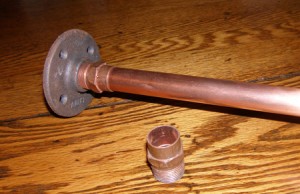
Brooklyn DesignI have used a lighter weight copper pipe for drapery installations before, in my friend’s framing shop.  We found all the parts we needed to run the curtains from wall to wall.  It’s a little tricky in this case as you have to assemble first and then install (so you need to know how many rings you will need before you start) but it’s a great industrial look and less expensive than custom metal rods and brackets. I show the parts used here. There is a threaded sleeve that screws into the base, which in turn is mounted to the wall.  The pipe fits into the sleeve.  Again, all must be assembled and then lifted into place and screwed into the wall- and takes down the same way.  Adding a few more rings later is not terribly convenient- best to plan ahead for this type of treatment.  In my installation we had painted the non-copper metal end piece black and the contrast was great looking.

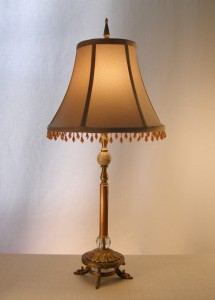
I often use plumbing pipe in my lamps.  I like the oxidized copper, and am getting ready to use some galvanized pipe on a pair of silver lamps.  I like to use other “humble” parts, and recently built a pair of lamps from hardware I had bought for this purpose- and some I upcycled from pieces I found when cleaning out my dad’s workshop.  I usually choose not to put a finish on these lamps and enjoy their “natural” patina.  I do mix humble parts with fancier vintage pieces as well.  For a “dressier” lamp I may give the humble parts a little polish and shine and find that when used judiciously, they step up to the occasion.Brooklyn Design


The Recycled Garden

Comments Off on The Recycled Garden Written on May 2nd, 2012 by
Categories: In the Garden, Olive Green
Tags: , , , , ,

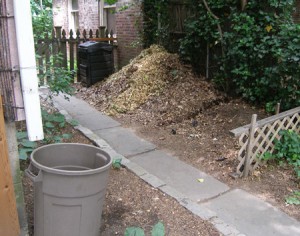
It occurs to me that, when operating correctly, gardens are really about recycling.  In an ideal world we use the discarded leaves and grasses and turnip tops and return them to the soil. They help nourish the new growth, the season ends, the next year we enrich the soil again, with last year’s nutrients.  Whenever I am showing people my grassless garden, more often than not it will end up with a tour of the compost pile(s).  For several years running now, I have held onto every leaf that fell into my yard, and tried to compost them.  By the end of the fall season, the piles are admittedly a bit overwhelming and I have occasionally had to resort to satellite compost piles in the yard…. but by spring it has always cooked down to a neatly managed amount.

I generally have several vintages of compost going, the 1st year pile and the 2nd year pile, which goes on the garden in the form of new dirt.  Because we get a lot of roots in the pile, I end up sieving the compost to ”make dirt”.  My daughter helps me with this and we get appropriately dirty in the process.  The first year pile gets turned several times -we just did it a few weeks ago.  Turning helps to consolidate the pile and in spring we usually need to add to it so turning helps to get it packed down.

My artist friend, Christine Hughes shares my enthusiasm for compost- here is one of a series of compost drawings that she has recently done.

There are leaf piles and then there is kitchen compost.  I love being able to keep my food waste down by composting.  In an effort to promote this diversion from the waste stream, black plastic composters were being distributed by the city a number of years ago, and I use mine all year long, trekking out in the snow to empty the tub I keep on the counter.

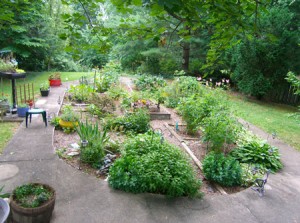
But for recycling, nothing beats my mom’s garden.  I helped her stake her plants last year, and the assortment of poles she used to do this consisted of every mop or broom handle she had used in the last 10 years. There are various repurposed containers around with plants in them, but her real claim to recycling stature is the garden itself.  When my parents retired to this home in Maryland 25 + years ago, it had an in ground pool.  Neither of them ever used it.  Figuring that it was perfectly sited for sun and convenience to the house, my mom had it filled in and created her dream garden. From the back deck you can see the oval outline of the concrete walkway that used to surround the pool.  She has enjoyed it far more thoroughly than she ever did as a pool, and the concrete surround makes it accessible even in mud times.