 Once spring hits, you see lovely container gardens everywhere; the window boxes and planters, the fabulous colorful pots on porches and paths. I asked my gardening expert friend Tracey Hohman how she makes them so beautifully and she shared her tips and tricks. She recommends starting the early plantings with hearty plants, like Pansy. I always know it’s time to set them out when I see them on her porch! For true summer plants the rule of thumb is to wait until Mother’s Day.
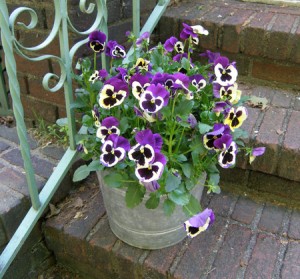
For showy blooms and great display, you can get a lot of drama planting a big pot with all the same flower, all same color, planted close together. Tracey shows a pot of pansies that were just ending their spring run. Alternatively you can mix colors of the same flower that co-ordinate with each other, in the same pot.
The Container How-To
- Start with a nice sized container or pot. Tracey shares my enthusiasm for clay pots- (I like the glazed ceramic ones as well, saw the most beautiful ones at Lapide Plants in the Terminal Market). You want them deep enough so that they don’t dry out quickly. One of the challenges of container gardening is keeping them watered!
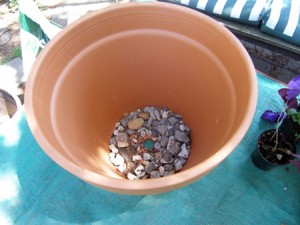
- Add gravel or rocks to the bottom to provide drainage. I follow my thrifty mom’s lead and recycle broken clay pots for this purpose, mixed with gravel. People are always asking me why I keep a bag of broken pots in the garage…
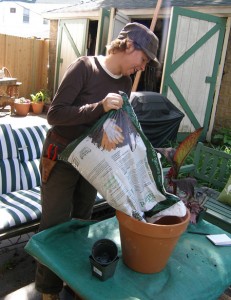
- The dirt on Dirt: Don’t recycle last year’s dirt without adding back some nutrients in the form of compost or garden manure. Tracey favors “Professional Potting Soil” that she picks up at Shannon’s Nursery on Fort Hamilton Avenue. You can use this straight out of the bag, but if you have some dirt in pots from last year and want to use it, remediate the soil with at least a third of fresh stuff and/or compost. Helpful Hint- do this whole operation on a tarp or plastic sheet- you can easily clean up later by dumping the spillage in the yard or garden.
- Fill the dirt only part way up in the pot, leaving room to set the plantings in with their pot dirt. You want to eventually have the whole thing about ¾”-1” below top rim of pot, so that water stays in when you water the pots.
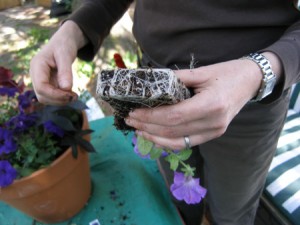
- Arrange them in the container, still in the nursery pots. Taller plants should be placed in the back with trailing plants in the front. You want to really plant them densely, to look abundant and lush. Trim off any withered leaves or stems now. Once you have them arrange nicely, take each one out of the nursery pot and before you place it in the dirt, work the roots a little, loosen them up so they are not “rootbound”.
- After you place them in, tuck more of the dirt in so that it fills the pot up to the 3/4” below the rim. Plants should be closely spaced, the dirt filled in between the plants where there is any gap and all around the edges of the pot. Pat dirt down lightly- and water when you are done. As an optional last step, you can add some mulch to the top of the planter on any exposed dirt- it helps retain moisture and looks more “finished”.
Plant suggestions
When considering your plant selection, you want to determine the light where they will be situated. 6 hours or more is “full sun” 4-6 hours is “partial sun”, anything less is shade.
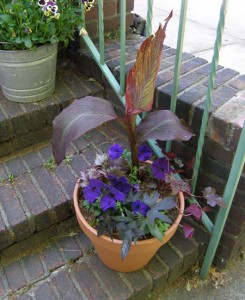
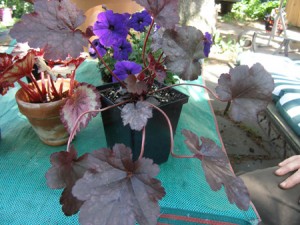 For the container we just did, Tracey used a variety of types of plants, mixing annuals, perennials- and houseplants. Send your weary potted plants to Summer Camp on the porch! They will be invigorated by the sunny porch living (provided you remember to regularly water) and in the fall, you can repot and bring the plant back inside. It’s a thrifty way to add more variety to your porch plantings. For height, she used a canna, and a classic annual, Petunia, for the shot of hot color. The house plants she mixed in were Begonia Rex and Oxalis. The perennial was Heuchera “Plum Pudding”. There was a red sweet potato vine that will eventually trail down the side of the planter once it gets situated. All the foliage plants selected had similar merlot coloring, but different shapes and textures, for interest.
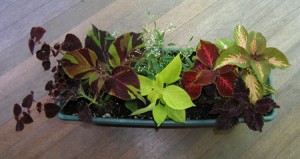 Tracey also showed me a great planter she had put together for the porch railing. It had a variety of different colored coleus for a shady area, and for the “trailer” a pretty white flower on a vine, called “Euphorbia Diamond Frost”. I am midway through making my porch planters, having refurbished and painted the wooden containers from last year (courtesy of one of our film shoots). I put coleus in one as per Tracey’s suggestions about grouping a single type of plants, and in the other I plan on moving the philodendron outside for some summer fun, still “browsing” through the indoor plants looking for something to give it some height.
Remember to water, often, especially when we get into the really hot season- if you are traveling on vacation a great idea to get someone to look after the plantings. As a final note, I would mention that my container plantings in the past have proved endlessly fascinating to the resident squirrel population, they seem convinced somehow that they have something buried in there from last year and I used to be out sweeping up the rummaged dirt every morning, rescuing broken plants. Cayenne pepper, sprinkled liberally discouraged this practice.
Happy planting.
