Posts Tagged ‘Green Ideas’

Silk Purse/Sow’s Ear

Comments Off on Silk Purse/Sow’s Ear Written on March 11th, 2014 by
Categories: Decorating Ideas, Olive Blog, Olive Design, Olive Green
Tags: , , , , ,

Curbside or thrift shop treasures while a bargain, usually lead me to the question- will I ever really fix this up to use it?   It depends on the level of decreptitude- or for me, if it’s the exact size piece I need for the space, and if its basically a better piece of furniture than I can buy cheaply.  While my kids hated the groovy painted furniture I put in their rooms and pined for Ikea almost-wood, I prefer a solid piece of real wood furniture in a classic shape and solidly built.  I can see past the peeling paint and occasional dangling part to what it could be with a little elbow grease.  But filling the space requirements is usually what tips me into actually doing the work on it.

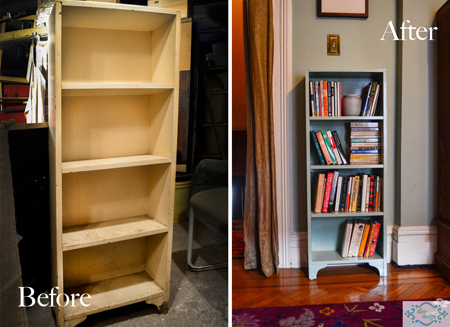
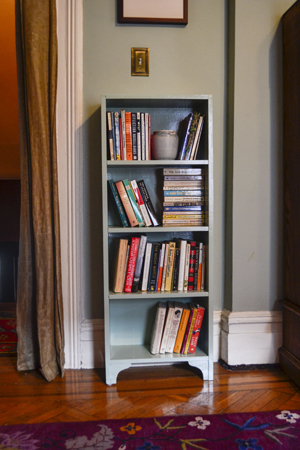
My latest rescue was the perfect sized bookshelf for my bedroom, when my excess books were stacked in front of the radiator and collecting dust on the floor. It was old, had a gazillion coats of paint, some peeling and the front leg was cracked.

Before you do anything, take off any paint that looks like it is ready to jump ship anyway, using a spackling knife rather than a scraping tool, so you don’t pull up tight paint- I didn’t want to strip it (way too much work for this piece) but if you have any notions that new paint glues down peeling old paint, disabuse yourself of that idea.  It usually means your new paint will soon come off as well.  Top coat is only as secure as the bottom layer.

After the removal of loose stuff, take a sander to it- it will smooth down the previous layers, some of the brush marks and let you know where drips are that you haven’t noticed.  Sometimes I help those off with a sharp razor.


Orbital palm sanders are cheap and easy to use, they should be  a part of any handy-person’s tool collection.

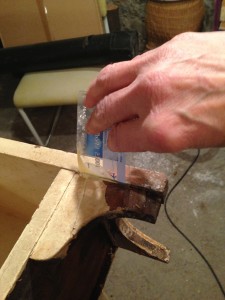
Fix the busted leg- I use an old your-name-here credit card that comes in the mail every day with new card offers, its just the right thickness to work the glue into the crack.


I use clamps to hold it in place while it dries, and glued a block into the corner behind the leg to give it more stability.  Cut the block down so you can’t see it from the front.  I clamp the leg so the glue can set.

Then predrill a hole, and run a flat head screw into several points to give it extra strength and stabilize it.
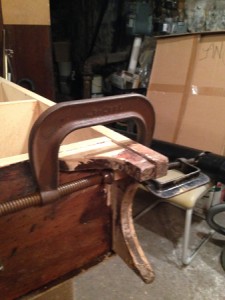
If you have the bits, its nice to counter sink the hole (a wider hole at the top to accommodate the flat screw head) so the screw isn’t noticeable, you can fill the top with compound to make it invisible. This fix it step took about 20 minutes, and now I don’t have to worry about the leg cracking off, and the fix is invisible.

For the paint job, I use the same type of paint, in this case oil-based.  I prefer alkyd paint for furniture anyway, as its tougher, but always best for paint adhesion to stick to the original paint type. For my color, I mixed some leftover oil based paints, to get something fairly close to the wall color.  I want the bookcase to blend in, not stand out.  If it was a more interesting accent piece I might have gone with a bolder color.

Once it’s done and in place, I’m glad I took the time!
 

For all the pinners out there:

My Pink Bathroom Update

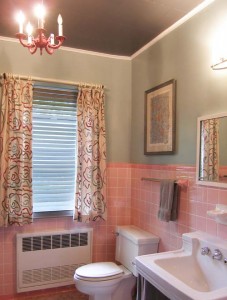
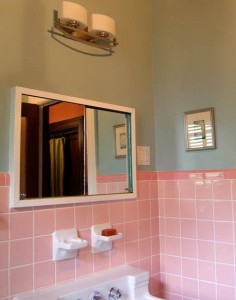
In the spirit of preserving the past with a contemporary twist, here is the completed update on the Pink Bathroom project. As a quick recap, this idea started with a visit to the Save My Pink Bathroom blog. As it turns out, there is an entire community of enthusiasts fighting to “save” their mid-century pink bathrooms. As Pam describes her mission:

“This little website grew out of mid-century home lovers’ concern that pink bathrooms were being ripped out of post-war American homes way too hastily. How sad it is, to catch a TV makeover show that rips out a perfectly beautiful vintage bathroom… Seems like a bunch of the rest of the world — well behind our curve — actually dislikes mid-century pink bathrooms.  They will regret what they have done.”

Often here in Flatbush with our turn of the century homes it was a mid-century decision to “modernize” the bathroom in the newly popular pink color. The tradition of the pink bathroom emerged from the former first lady Mamie Eisenhower, in office 1953 –1961.

Looking at them now, they are totally dated, but with the wrong date stamp for our late victorian houses. Fiscal prudence often dictates embracing the pink bathroom and working with what you have, and I have grown quite fond of mine.  It must be the fourth pink bathroom I have had since I started householding. For a low-cost, low-environmental impact project, here are my tips on saving your pink bathroom – or redecorating any bathroom for that matter.

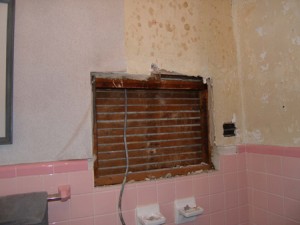
I was missing a few pink bullnose tiles that had fallen out and broken years ago, and pulling the medicine cabinet out of the wallOlive Design Bathroom damaged a few more.  As per my previous blog on this, I sent one of the samples to Chippy Scaparelli at World of Tile. She sent back 4 tiles that were a perfect match.  Thanks to Pam for featuring that tip on her site.  My contractor, John Duval, replaced the missing tiles and you can’t tell now which ones they were, it is seamless.  I opted to have the contractor regrout the entire bathroom.  What a huge improvement, it looked brand new, sharp crisp and clean. Worth every penny, and my contractor was amazing in keeping the mess contained- he wiped down the stairs as he was leaving so it wasn’t tracked all over- I was very impressed.


I discovered that “clear” in powder coating is 1. More expensive and 2. Not clear at all but a weird taupey/gray.  It looked awful.  The folks at Evernu Metal were kind enough to offer to recoat it in white. It wasn’t what I was going for originally, but it looks fresh and pretty against the bright white new grouting.  The inside I painted turquoise, just for fun.

I knew what color I had in mind for the walls, and in the spirit of both thrift and environmentalism, I went down to my shop in the basement and mixed up just the color I needed using various leftover paint samples.  Mixing left over paint is a great alternative if you don’t want to discard it or wait for the yearly collection of hazardous waste materials that the city sponsors. If you don’t have any leftover paint from previous projects, go to Build-It-Green NYC, arguably the best source of paint for a low-cost project. They have gallons upon gallons of paint in their Astoria warehouse.. many for $5 a can. They get their supplies donated from surplus construction and renovation projects, so if you can’t re-use your own paint, re-use theirs! (P.S. they also have another location in Gowanus, Brooklyn). Another place with the same ethos is Habitat for Humanity’s ReStore for those of you located in Westchester, Long Island, and beyond.

The shower curtain and window fabric that I used was made from yardage I had hand screened printed while an apprentice at the Fabric Workshop in Philadelphia after college. The colors worked well with both tile and wall color, and I liked the funky pattern in here- and bonus point, I already had the fabric, and was glad to see it used.

My pink chandelier was up-cycled from a table lamp part that I converted into a hanging fixture, and painted to match the bathroom.  The ceiling in the bathroom is dropped and made of some sort of acoustical tile that had seen better days.  I had routinely painted it gloss white in the past to freshen it, but I took the opposite tack here and made another “mary mix” paint from the samples stash, and came up with a nice charcoal gray.  It looks dramatic, and helps hide the flaws in the ceiling.  The dark color seems to make the ceiling float up and away

As with most projects, this one took about twice as much time as initially anticipated. Overall, I am pleased with the outcome and loving my pink bathroom!


Would love to hear your comments on my Facebook page on how you’ve updated your own bathroom with a budget and environmentally conscious approach.


Tivoli Mercantile and the Amazing Technicolored Chalkboard

Comments Off on Tivoli Mercantile and the Amazing Technicolored Chalkboard Written on February 15th, 2012 by
Categories: Decorating Ideas
Tags: , , , ,

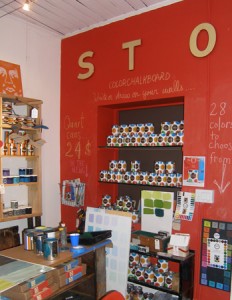
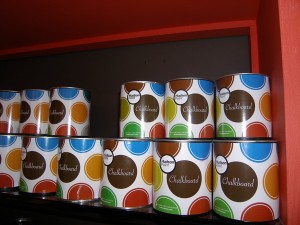
Color Chalkboard PaintChalkboard doesn’t need to be the black or green from school days of yore. While I was upstate this weekend, I went to this wonderful store called Tivoli Mercantile in Red Hook, New York.  They carry Hudson Paint, which features chalkboard paint in amazing colors.  Pinks!  Blues!  Chalkboards have all new possibilites, if you were hesitant about creating a blackboard door or wall (see previous post) because the black was a little bit overpowering, now you have many more options.Color Chalkboard

Tivoli Mercantile also carries paint developed for doors and floors as well as a primer.  I’m going to try the Lime Paint, which the company describes in their brochure as- “one of the world’s oldest paint formulas mixed with today’s best technology.  Lime is our liquid stone.  It is naturally anti-fungal, breathable and zero VOC.  Lime can be used in interior or exterior applications and produces a matte textured patina specific to the surface it is applied to.  Revive your home with one of the most natural paints available.”

Color Chalkboard

The paint is manufactured for them in a factory in the Hudson Valley.

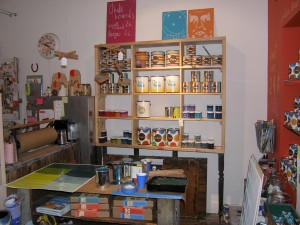
Its so great finding small stores with niche products, Tivoli Mercantile had all kinds of interesting gadgets and clothes, besides their proprietary paint. If you’re trekking upstate, worth a visit!  5 East Market Street, Red Hook, New York.